
Writing your life story or documenting your memories can be tough. A blank sheet of paper or notebook can be especially daunting for you if you've never written anything personal about yourself before. To help you in this process, we have developed a 12-part series of storybooking prompts that you can use as a basis for documenting your life.
The first part is: Family History
- What is your birth date and place of birth?
- What are the names of your parents & siblings?
- Where did your family come from?
- What is unique or special about your background?
- How did your ancestors contribute to your future?
- How did your parents choose your name (any nicknames)?
We hope you enjoy using these prompts as much as we enjoyed creating them for you! Please leave a comment and let us know how they worked for you. Look out for the next prompts in the series: Childhood.

So much so that I have started my 2nd yarn, using a bat of Purple People Eater (purple is my favorite color). My plan is to spin this yarn as thin as I can and try to create something in a sport or dk weight, for shawl knitting (lace weight would be too ambitious).
I have to say I never thought I'd become a spinner but I have to say it is both enjoyable and relaxing,and has a useful output. I can see myself easily creating far more handspun yarn than I'll ever have time to knit, so knitter friends you may be getting some handspun sometime soon!
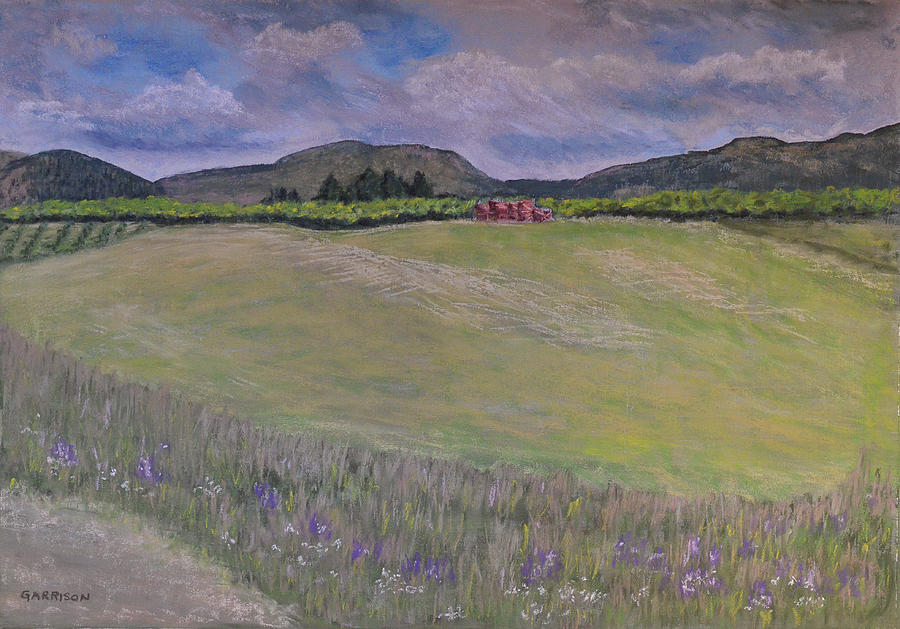
Finally finished this painting I started over a year ago. It's been sitting on my easel waiting for some love. The missing part was the foreground hedgerow and the apple boxes.
Not sure if non-Okanaganites will recognize those!
I'm pretty happy with how it turned out, especially those rolling clouds.
Like many people who have been touched by either an iPhone or an iPad, I made the move to the Mac with my last computer purchase (iMac). I love it! But I still have my PC laptop running Windows 7.
I am still trying to get the two systems to live in harmony. I would like to be able to share a Lightroom catalog and photos between the two systems.
I already have a 640GB external hard drive (EHD) attached to my iMac and formatted in HFS format (Mac). This was necessary because the iMac won't Time Machine backup an EHD unless it is HFS.
Of course this introduced the problem of how the Windows machine was going to read the drive. During my research I came across a program called MacDrive that claims to provide read/write access to EHDs on a windows system. I installed the software and, yes, the windows machine could read and write to the drive. Of course I wouldn't be writing this post if that was the end of the story :)
I unplugged the EHD and took it back to my iMac. Wait, the iMac can't see the EHD? What's that about? I plugged the EHD back into the windows machine and lo and behold it works fine. So let me see, software that is specifically designed for your windows machine to read your Mac's EHD suddenly won't let the Mac see it. Isn't that the whole point?
Now I have a mac-formatted EHD that only a Windows machine running MacDrive can read. I am scared to uninstall MacDrive until I've finished backing up the EHD onto the Windows machine just in case.
So if you are successfully sharing an EHD between Windows and Mac, can you please leave a comment as to how you are doing it and which format the drive is in (NTFS, FAT32 or HFS).
Honestly, this makes me want to run out and buy a new mac laptop!
I am still trying to get the two systems to live in harmony. I would like to be able to share a Lightroom catalog and photos between the two systems.
I already have a 640GB external hard drive (EHD) attached to my iMac and formatted in HFS format (Mac). This was necessary because the iMac won't Time Machine backup an EHD unless it is HFS.
Of course this introduced the problem of how the Windows machine was going to read the drive. During my research I came across a program called MacDrive that claims to provide read/write access to EHDs on a windows system. I installed the software and, yes, the windows machine could read and write to the drive. Of course I wouldn't be writing this post if that was the end of the story :)
I unplugged the EHD and took it back to my iMac. Wait, the iMac can't see the EHD? What's that about? I plugged the EHD back into the windows machine and lo and behold it works fine. So let me see, software that is specifically designed for your windows machine to read your Mac's EHD suddenly won't let the Mac see it. Isn't that the whole point?
Now I have a mac-formatted EHD that only a Windows machine running MacDrive can read. I am scared to uninstall MacDrive until I've finished backing up the EHD onto the Windows machine just in case.
So if you are successfully sharing an EHD between Windows and Mac, can you please leave a comment as to how you are doing it and which format the drive is in (NTFS, FAT32 or HFS).
Honestly, this makes me want to run out and buy a new mac laptop!
February was the month I tried oil painting for the first time. It's been the last medium (?) that I've attempted to work with. The chemicals and poisons involved have given me some concern with young children in the house, but now they are old enough to understand not to drink or touch mommy's art supplies!
Of course, it may be the medium I have enjoyed the most or perhaps it's just been so long since I painted anything that I had such fun.
Cut - $200
16 x 20 Oil on Canvas

Sunshine in a Vase - $100
5 x 7 Oil on canvas board

Of course, it may be the medium I have enjoyed the most or perhaps it's just been so long since I painted anything that I had such fun.
Cut - $200
16 x 20 Oil on Canvas

Sunshine in a Vase - $100
5 x 7 Oil on canvas board
Today I received an email from a reader of the post In The Swim asking for help in created this type of collage in Lightroom.

The collage is 8x8 and uses 2 large vertical photos and 2 small horizontal photos. So here are some instructions on how to create it. Once you have mastered this technique you will be able to create photos of any size you want in any quantity.

The collage is 8x8 and uses 2 large vertical photos and 2 small horizontal photos. So here are some instructions on how to create it. Once you have mastered this technique you will be able to create photos of any size you want in any quantity.
To create an 8x8 collage in Lightroom (updated for LR5).
CLICK HERE FOR THE *FREE* VIDEO TUTORIAL
1. Go to the Print module.
2. Begin by selecting a Custom Package.
3. Click on Page Setup to ensure you have US Letter (8.5 x 11 inches) selected.
4. On the right side of the screen, expand your Rulers, Grid & Guides panel. Switch on Show Guides.
5. Then expand your Cells panel. Select 4x6 and it will add to the sheet of paper. If it adds a border then you'll need to remove it in the Image Settings panel by switching off the Photo Border option. I like to keep the Inner Stroke option selected to create the white line around the photo and because it's an Inner Stroke it's inside the 6x4 and doesn't make the page wider.
6. Adjust your image boxes to be only 4 x 5.53 inches by playing with the Adjust Selected Cell Height and Width. Notice you can move the sliders or manually type in the number of use your arrows to go up and down. Position your box in the top left corner.
7. Once you have the box the perfect size you can hold down your Alt Key and then click and drag it to make a duplicate box which you'll position at the right edge of our imaginary 8x8 sheet of paper (note you are likely to have an 1/8th inch margin so take that into account.
8. Then add another cell that is 2.47 x 4 inches and position it in the empty corner space. Again press the Alt key and click and drag a second copy into the other corner.
9. In the Template Browser select the + sign to create a New Template.
10. Enter a template name "8x8 - 2v + 2 h" (this format tells me the size and how many vertical and horizontal photos I can add, and that the vertical photos are larger than the horizontal because they are first at a glance). Click Create.
(Note: if you have to edit after you create the template, you right click the template name and select "update with current settings".)
11. The image you see in the center which says Marina Garrison Photography, is the logo image prepared in advance in .png format. To switch on your page identify plate, expand the Page panel, select Identify Plate and add it from the drop down menu. If you don't have an existing logo, you will need to Choose the image from the Image Options panel.
You could also prepare a large amount of text as a .jpg image to insert into one of the cells.
12. To add the images you simply select your photos before going to the Print module, then drag them from the area at the bottom of the screen into the cells you created.
You should now have a collage similar to the one in the post. This template is reusable and can be used as a starting point for making additional templates - try making one with 2 large horizontal photos and 2 small vertical photos next.
Have fun with your Lightroom photo collages!
Edited (09/15/2012):
Instead of steps 2 and 3 above, you could also select Layout Style > Custom Package and Cells > Clear Layout. This will give you a blank layout to start out with.
To change your page size, select Page Setup and select your paper size.
Edited (09/15/2012):
Instead of steps 2 and 3 above, you could also select Layout Style > Custom Package and Cells > Clear Layout. This will give you a blank layout to start out with.
To change your page size, select Page Setup and select your paper size.


